Indevtech Blog
Tip of the Week: Use Microsoft Word To Create Envelopes For Your Contacts

Microsoft Office has long been a valuable asset for all types of businesses, but would you be surprised to hear that most organizations don’t take full advantage of it? All of the most recent editions of programs like Microsoft Word, Excel, and PowerPoint are designed with powerful, user-friendly interfaces that allow your business to do lots of neat things. In fact, you can create a professional envelope for your organization, add a list of contacts from a CSV file or from Outlook, and so much more.
Step 1: Open a New Document
Step 2: Access the Layout Menu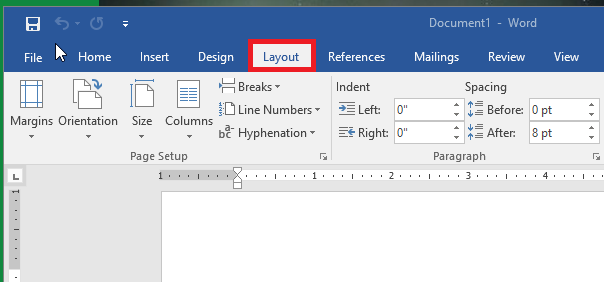
Step 3: Change the Size of the Page
You want the page to be set to the proper envelope size. If you need to know what size your envelopes are, try checking the box. #10 is generally the traditional letter envelope.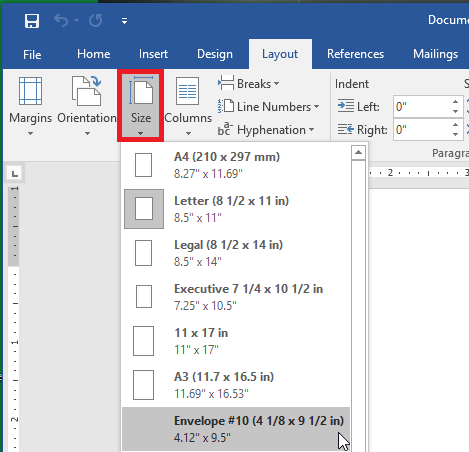
Step 4: Check the Layout
Before proceeding, make sure that the layout has changed to the proper size.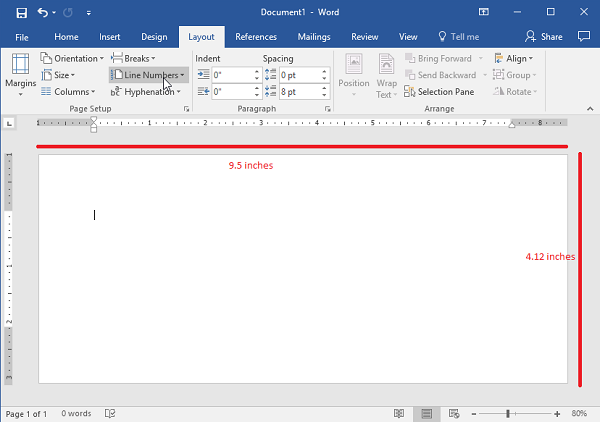
Step 5: Go to the Insert Tab and Select Text Box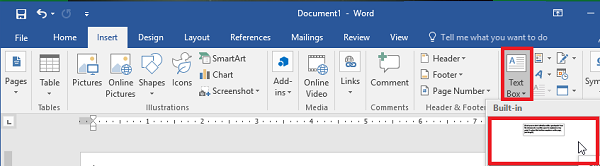
Step 6: Use the Simple Text Box Option
This will be used for your return address.
Step 7: Update the Address and Draft the Text to the Desired Location.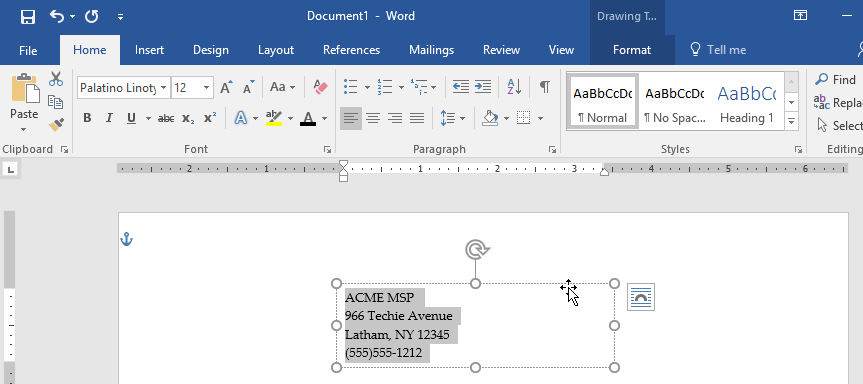
Step 8: Remove the Border Around the Text Box
You can do this by right-clicking the box and selecting Format Shape. Switch the radial button from Solid Line to No Line.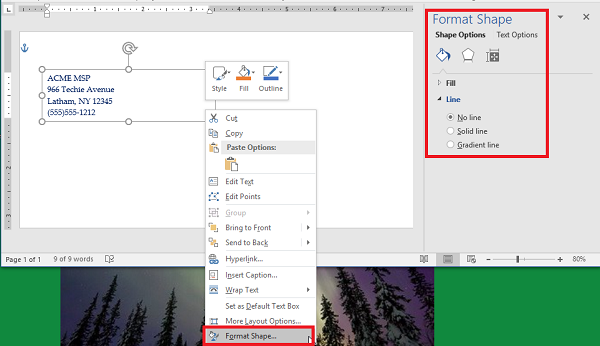
Step 9: Style and Brand Your Return Address
You can use the Font options to customize the appearance of your return address. Make sure you don’t forget your logo.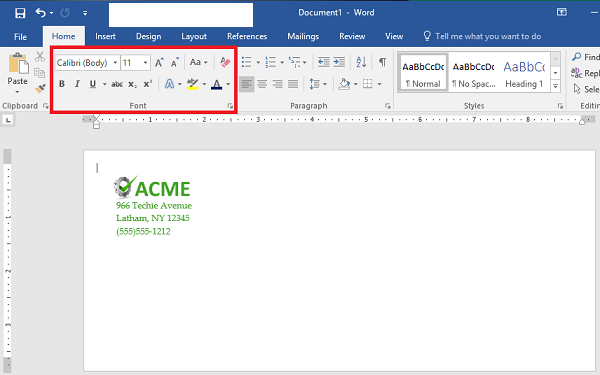
Step 10: Start Your Mail Merge
First, let’s add another Text Box. You should remove the standing text and leave the cursor right where it is in the box.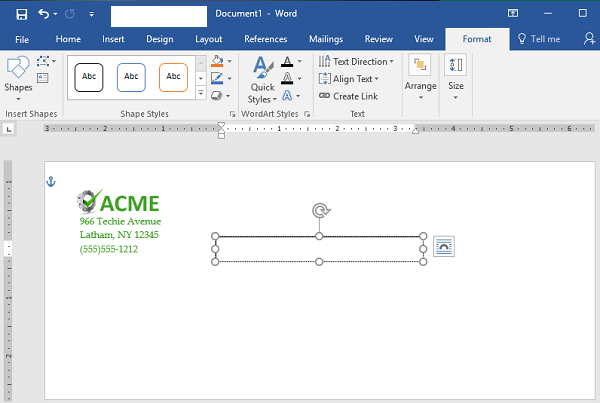
Step 11: Load Your Contacts
To do this, access Select Recipients and check the source of your contacts. You’ll need a CSV file for this next step.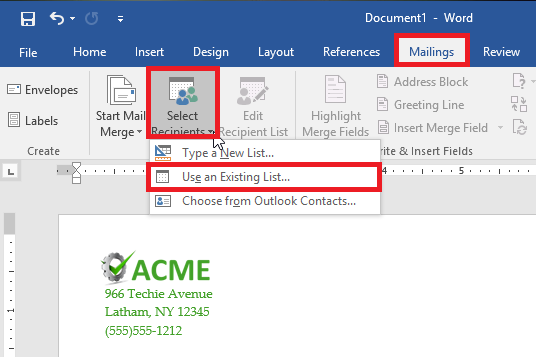
Step 12: Select Address Box. This appears in the text box that you created earlier.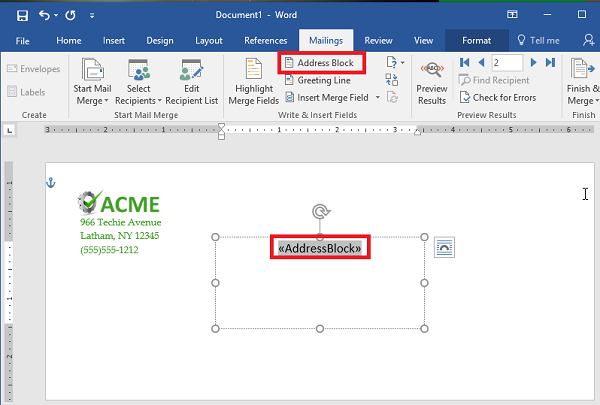
Step 13: Follow the Directions to Format Your Address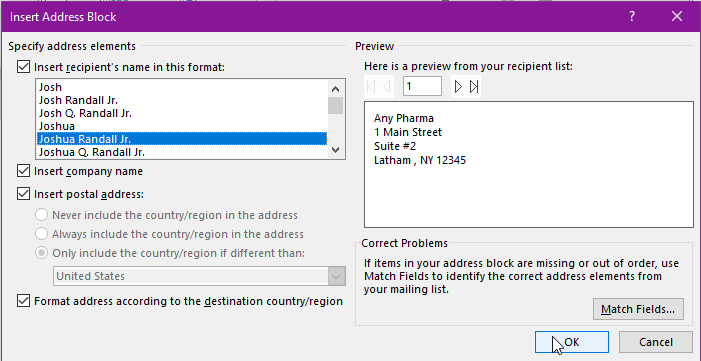
Step 14: Preview Your Results
Use the Preview Results option to check that the addresses are displaying properly, are simple to read, and fit on the envelope. This might change depending on how many recipients you have. Just scroll through them to ensure that the formatting remains the same throughout them all.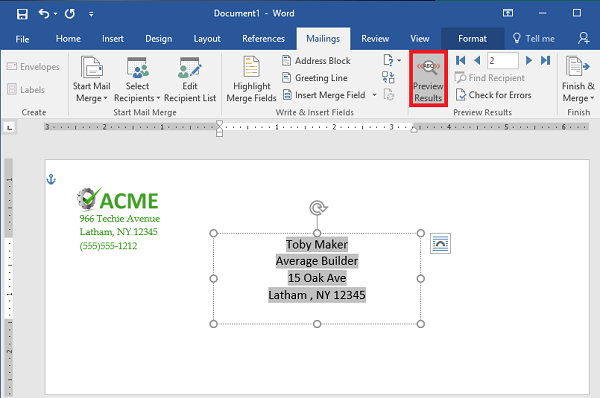
Step 15: Save or Print
That just about wraps it up. You can finish your work or print them out as you see fit.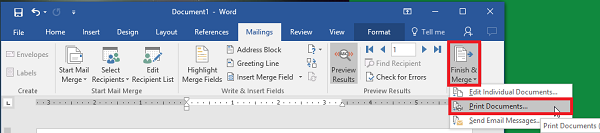
For more great tips and tricks, subscribe to Indevtech’s blog.
About the author